How to install an SSL certificate with Microsoft Exchange
On 06/08/2018 By Valentin RicciStep 1 - CSR generation from Exchange 2016
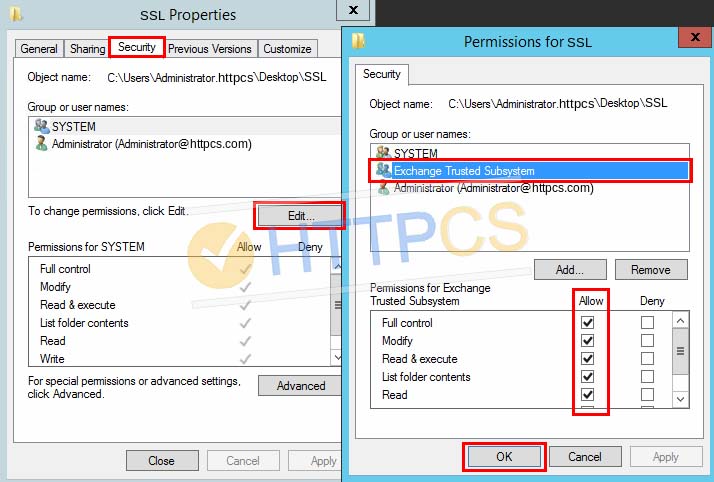
First we have to create a shared directory with all permissions for the « Exchange Trusted Subsystem » group. The CSR has to be stored in a shared directory. For this tutorial I'll create a shared directory named « SSL » on my Exchange server's desktop. You can setup the directory anywhere you like as long as Exchange server has read permission on it.
1. Create a directory, right-click on it and go to « Properties » → « Sharing » → « Advanced Sharing » and check « Share this folder ». Then click on « Permissions » and check « Full Control » for « Everyone ».

2. Go to the « Security » tab, click on « Edit », then « Add ... » to add a new group that you will name « Exchange Trusted Subsystem ». Assign full permissions to this group.
3. Now you can generate your CSR from Exchange. Log in to the « Exchange Admin Center », Click on « Servers », then click on the « Certificates » tab.
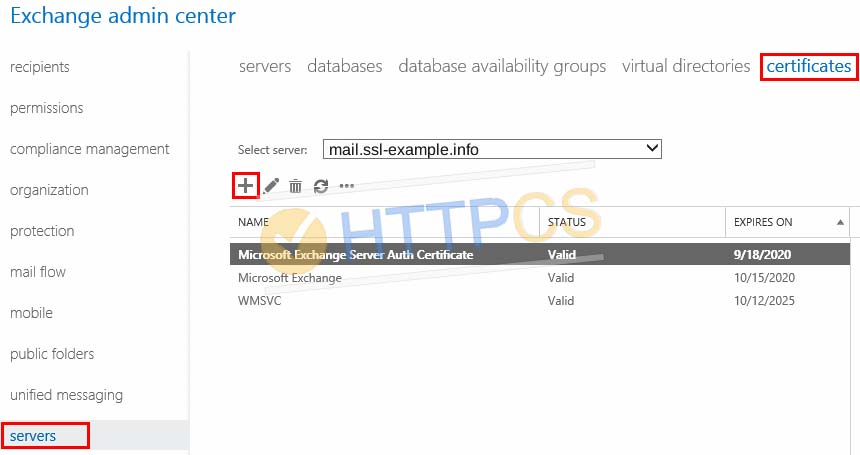
You should see 3 certificates. Do not delete the « WMSVC » one, it is necessary for remote management of your web server.
4. Click on the « + » button to add a new certificate.
Choose « Create a request for a certificate from a certification authority » then click on « Next ».

5. Enter a user friendly name to identify this certificate.

6. Select your mail server. This server will store the CSR.

7. At this stage, you can specify the domain names to be included in the certificate. You can leave the default value and specify domain names during the next step.
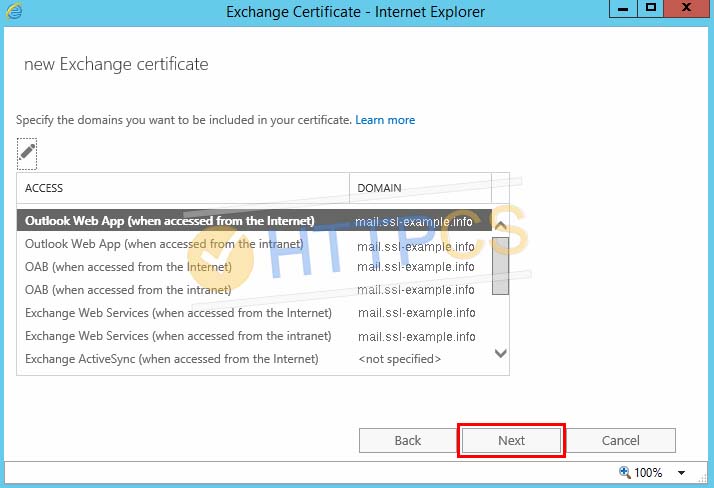
8. You can remove any unwanted domain name by clicking on the « - » button.

9. Fill in your organization information.

10. Choose the shared folder we've created at the beginning of this tutorial.
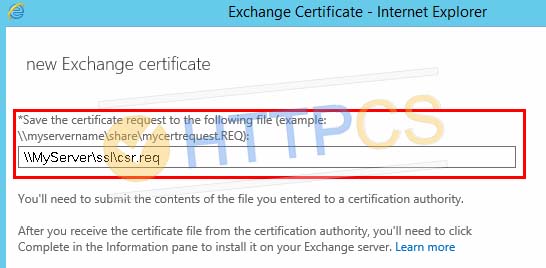
11. Now you can use your CSR to buy an SSL certificate.
Step 2 - SSL certificate installation
Once your certificate is issued by the Certificate Authority, you can download it from your HTTPCS dashboard.
Download and store it in the shared directory we've created earlier.

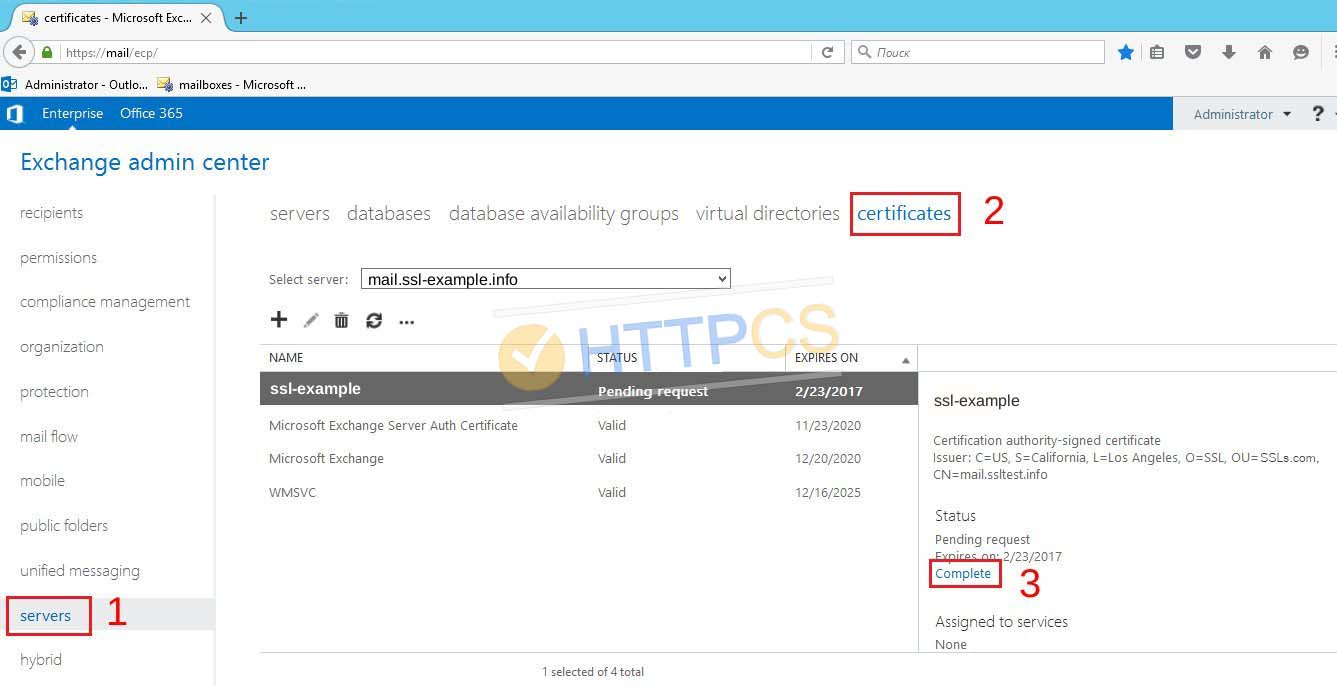
1. Log in to your Exchange Administration Center in a browser (ex. https://server-example.com/ecp) and click on « Servers ». Then go to « Certificates » tab.
Choose your certificate from the list and click on the « Complete » button located on the right side.
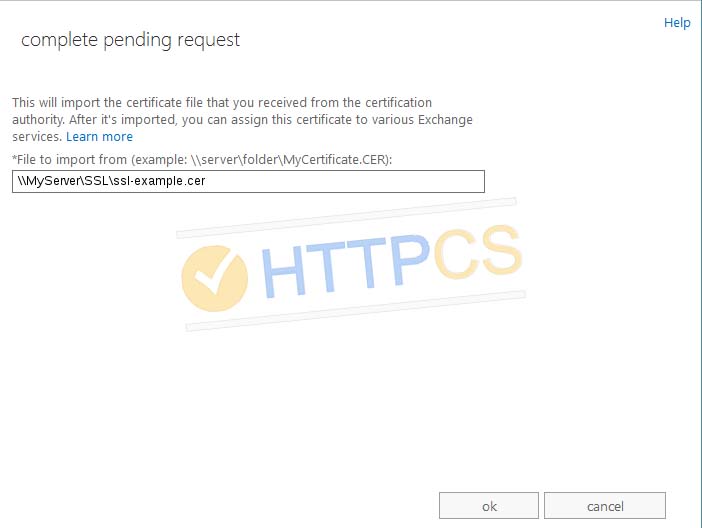
2. Enter the path to the directory which contains the certificate.
3. The « Pending request » certificate becomes « Valid » in the certificates list.
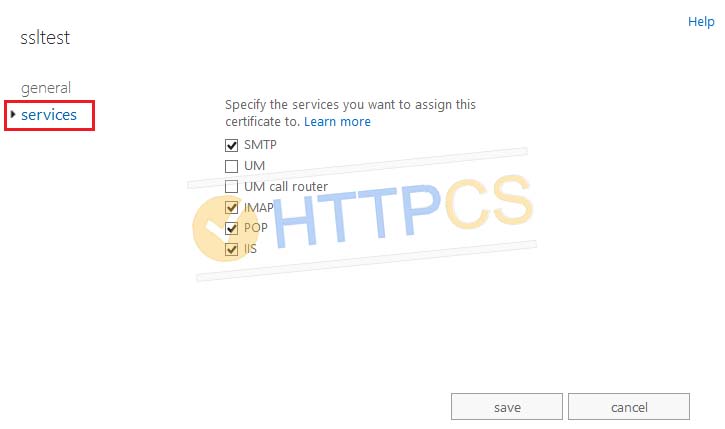
NB : If you need to secure the Exchange services such a IIS, POP, IMAP or SMTP, your certificates need to be manually enabled for them. Select the certificate in the Certificates list then click on « Edit ».

4. Then, click on « Services » and check the services you want to be secured with the certificate.
5. A warning message may appear, asking if you want to overwrite the existing certificate. In most cases, the self-signed certificate is installed by default.
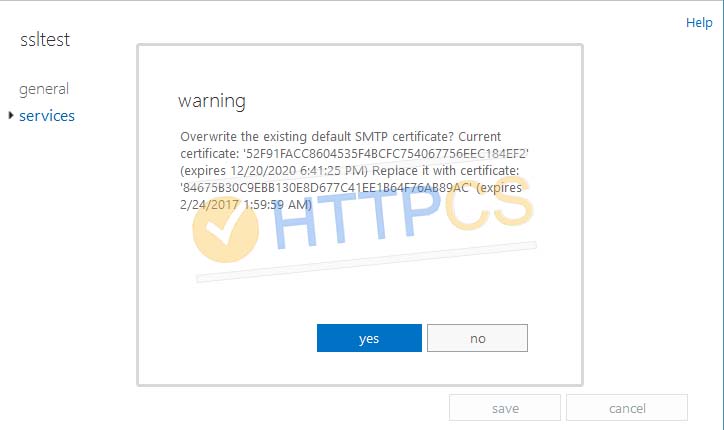
6. Click « Yes » to assign your new trusted certificate to the service and finish the installation.

7. You can now check your SSL certificate.
Import a certificate on Microsoft Exchange
If you haven't generated your CSR on Exchange, you can still import it as a PKCS#12 (.pfx) certificate. To do so, convert your certificate to PKCS#12 format.
Then, go to the « Exchange Administration Center » and select the Exchange server you want to install the certificate on. Then click on « ... » and select « Import Exchange certificate ». The « Import Exhange certificate wizard » opens. Locate your PKCS#12 certificate and click « Next ».
Now you can verify the installation was successful.
Buy a cheap SSL certificate for Microsoft Exchange


